
Another crack at the vacpot cocktail. This time I wasn’t shy about using the whole batch at once, and it worked much better.
The cocktail base here is a curious concoction of Compass Box Great King St. Glasgow Blend Scotch Whisky, Compass Box The Peat Monster Scotch, BroVo Ginger Liqueur, honey syrup (honey and water, 2:1), ginger syrup (made by mixing freshly juiced ginger with an equal weight of sugar), citric acid and water.
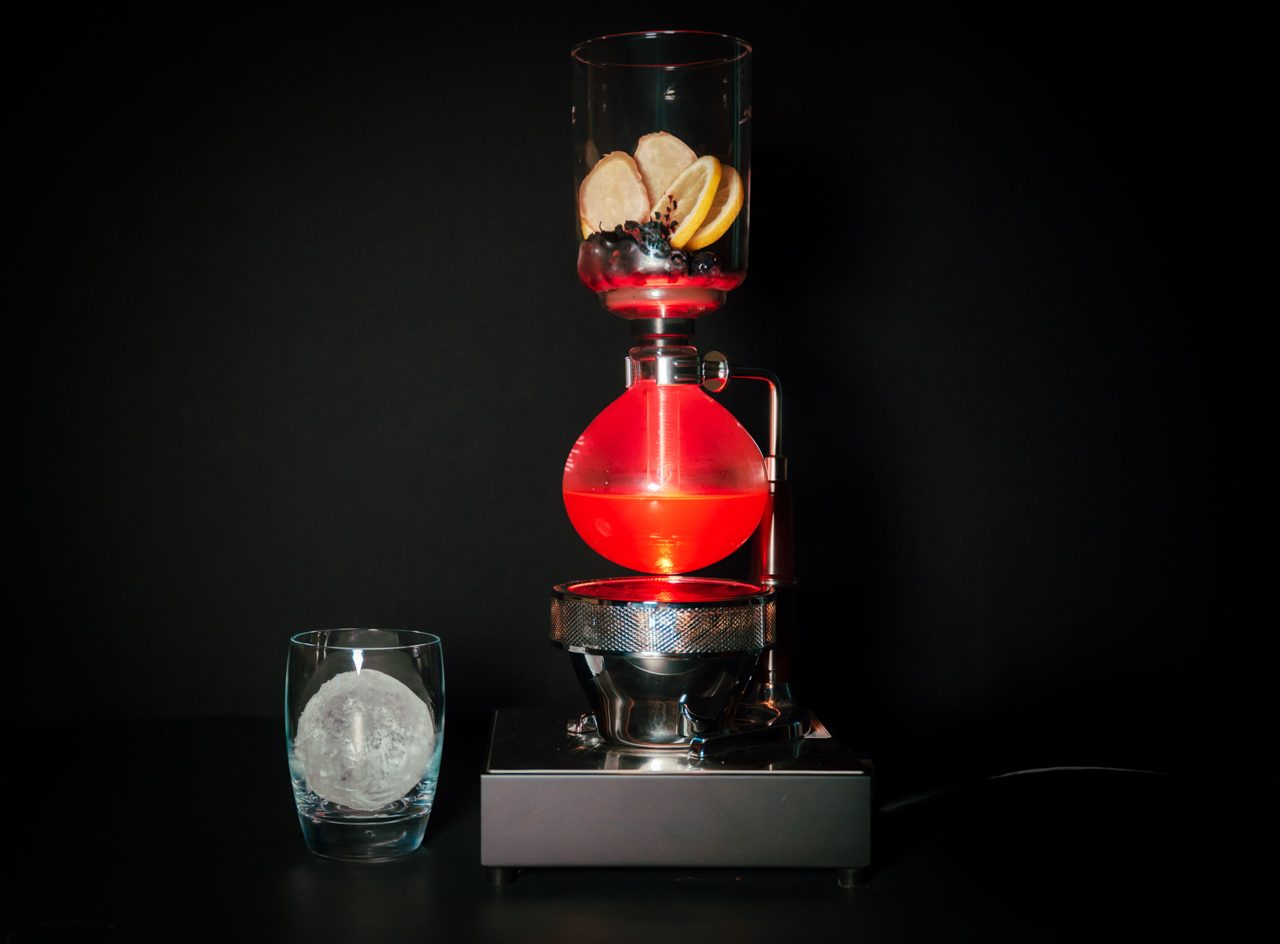
In the upper chamber are frozen blueberries, sliced ginger, lemons slices, Rare Tea Cellar Berry Meritage, and dry ice.
So, the cocktail base is heated, and the vapor pressure forces the liquid into the upper chamber, where it meets the tea and aromatics and fruit. It also meets dry ice, which instantly cools it down and makes the whole thing look, well, science A.F. It definitely impressed the kids! When you remove the heat from the bottom, a vacuum is formed inside the bottom chamber, which sucks the liquid back down (I imagine gravity plays a role too). In this case, the returning liquid is red (from the tea) and cold (from the dry ice).
You then pour the finished brew into a glass with ¼ ounce of lemon juice and a hand-chipped chunk of ice (more on that below).
Disappointingly, I actually felt the finished product was too balanced. All these bold flavors (peat, ginger, honey, berries, lemon) came together and seemed to cancel each other out. The cocktail tasted like alcoholic berry tea. It was nice, and the presentation was killer, but the taste was pretty flat for me. I’ll bet you could approximate the finished product using vodka or white rum. That came as a big surprise to me after having blended two exceptionally bold scotches into the base.
On Clear Ice:
Making clear ice is an important part of making good cocktails. Because (1) it looks fantastic, (2) it’s less likely to impart the taste of your freezer (because that taste comes from the air that is trapped inside of cloudy ice). As far as I can tell a gentleman named Camper English was the first guy to figure out how to make clear ice at home. You can check out his blog at https://www.alcademics.com/index-of-ice-experiments-on-alcademics.html. In addition to his method, there are tons of gimmicks you can buy to aid in the process. None of them work as well as Camper’s method, and they all cost more money and take more time. Here’s the basic idea:
You get a little cooler. I’ve tried a few, and this is the best one for me. At present, it costs about $11. Remove the lid. Fill it up with water. I use water right from the tap. Not hot. Leave about 1.5 inch of room at the top of the cooler. Put it in the freezer without the lid (that’s important). Leave it for 24 – 36 hours. It’s important not to leave it for much longer than this. Ideally you want some unfrozen water remaining when you extract your ice. You just tip the cooler upside down and let it sit for a minute or two. I generally set it in the sink because if I’ve done it correctly when the ice slides out some unfrozen water will come with is. This is not cool when it happens on the counter. If you leave it in the freezer for too long, the entire block will freeze, and it can become very difficult to get the ice out of the cooler. Ask me how I know.
This method works due to something called directional freezing. Most ice cubes freeze from all directions, starting from the outside and working toward the center. As the ice freezer inward, the air that was invariably trapped in the water gets compressed in the center of the cube, which is what makes it cloudy, and also makes it taste like the freezer burnt party pizza that’s been in there for way too long. On the other hand, when you freeze a block of ice inside of an insulated cooler with the top off, the top starts freezing before the sides or the bottom. The freezing continues from the top to the bottom, forcing all of the trapped air to the bottom of the block. If you nail the timing when the ice block slides out of the cooler the bottom will be unfrozen, and the remaining water and trapped air will spill out. If the block does freeze completely (or nearly completely) the bottom of the block of ice will be cloudy, while the top of the block will be crystal clear.
To carve this igloo brick into cubes the only tool you’ll need is a bread knife and a hammer (I actually use a wooden mallet). Score the ice with the knife, then gently but confidently tap on the knife with the hammer, and the block will break approximately along your score line. I find it best to split the block in half lengthwise so the resulting two pieces are half the length of the longest edge of the cooler – this way my knife is long enough to cover the entire block. Then I hack off the bottom cloudy part, then go to town busting it up into cubes. You can get about 12 2×2 inch cubes in this manner.
In the case of the Science A.F. cocktail, I shaped a 4×4 inch cube into a sphere by systematically shaving off each edge and each corner, over and over. I probably won’t rush to do this again, but it was pretty cool having a perfectly clear ice sphere!